Reading hallmarks is quite interesting and although it may seem difficult in the beginning, it does become easier over time with practice. Thus, you will be able to identify exactly where and when your silver was made. Due to the use of hallmarks on English silver, the collector and (the novice or student) is able to trace the complete ancestry of nearly any piece. Most of the English, Scottish and Irish silver produced in the last 400 years is stamped with either 4 or 5 symbols, which are referred to as hallmarks. The purpose of these marks is to show that the metal, upon which they are stamped, is of a certain level of purity. The metal is tested and then marked at special offices, regulated by the government, known as assay offices. In England, the craft was regulated by the Guild of Goldsmiths at London and in Ireland, by the Guild at Dublin. In Scotland, the craft was supervised by the Edinburgh Goldsmiths’ Incorporation. Only the metal that adhered to the required standard will be marked, and there are no exceptions. This is very beneficial for the consumer as it gives them protection and a sense of security. This hallmarking system is one of the reasons why England has produced more fine silver than any other country as you are able to identify exactly who and when a piece of silver was made.
There are a plethora of books that you can buy including my grandfather’s book “The Book of Old Silver” which provides a guide to learning about hallmarks. I actually prefer using a pocket-size “Bradbury’s Book of Hallmarks” which I think is very good and I use it when I am out at antique shows, and shops, and visiting private clients. This is a condensed version, very explicit and easy to carry around. Looking up hallmarks takes time. However, once you get acclimated to learning the process, it becomes enjoyable and actually sometimes fun (like a crossword puzzle) to do.

Step # 1
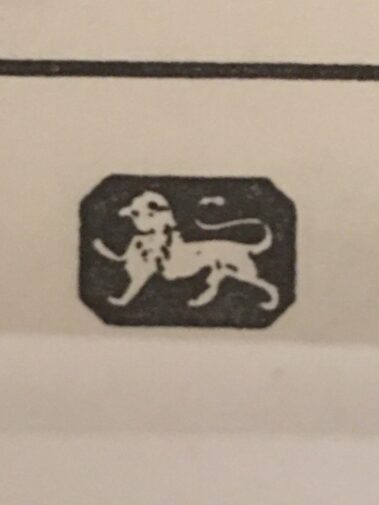
The first mark is the standard mark which determines the fineness of the metal. The lion passant was adopted as the Sterling standard mark in London in 1544. All London silver made since then must have this mark. There are 5 different standard marks depending upon where the piece was actually made.
- The walking lion for all sterling silver made in England
- The crowned harp for all sterling silver made in Dublin
- The thistle for all sterling silver made in Edinburgh
- The standing lion for all sterling silver made in Glasgow
- The image of Britannia for Britannia standard silver
If your particular item does not have one of these standard fineness marks, then it is probably silverplate or perhaps it is from another country.
Step # 2
Locate and identify the city mark which enables the location of the office of the assay to be traced. This mark differs at each assay office and was first introduced in London near the end of the 14th century.
- The leopard’s head crown for any silver made in London prior to 1820
- The leopard’s head uncrowned for any silver made in London after 1820
- The crown for silver hallmarked in Sheffield
- The anchor for silver hallmarked in Birmingham
- The three wheat sheaves for silver hallmarked in Chester
- The castle for silver hallmarked in Edinburgh
- The tree, fish, bell, and bird for silver hallmarked in Glasgow
- The crowned harp for any silver hallmarked in Dublin until 1806
- The Hibernia for any silver hallmarked in Dublin from 1807 to the present

Once you begin to look up hallmarks on a consistent basis, you will become more familiar with them.
Step # 3
The Sovereign’s Head was only stamped in certain years. It was required to be used to denote the payment of duty by the silversmith to the Crown. It appears on all articles that were made between 1784 until 1890. In the first year (1784) and the year following that, the head faced to the left on all silver pieces. From 1786 until 1838, the King’s head Duty mark always faces to the right. When Queen Victoria ascended to the throne, the mark was replaced with the Queen’s head duty mark and this always faces to the left. In 1890 the duty on silver was repealed, and the use of the sovereign’s head was discontinued.
Step # 4
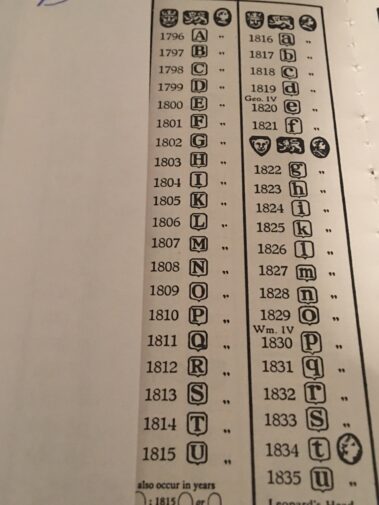
It is quite important to make sure you do steps 1 and 2 before attempting to do step 4. Step # 3 is not always needed depending upon when the piece of silver was made. Once you determine in what city the piece was made, you then can concentrate on the date letter to determine the exact year in which a piece was made. The use of the date letter was arranged in cycles of twenty years using the letters A to U or V, but excluding J. At the end of each 20 years, a different type of letter was used and the cartouche was changed. It is quite important to note that each city has a different series of letters starting in a different year. This is very important because depending upon what city the article was made in, there will be a different year.
For example, the date letter for 1893 in London is an uppercase ‘S’, in Birmingham it is a lowercase ‘t’ and in Sheffield, it is a lowercase ‘a’. The shield and a different type of letter were used in each case.
Step # 5
The first maker’s marks were generally flowers, animals, hearts, crosses, or other symbols generally selected in allusion to the maker’s name. This system fell into disuse in the seventeenth century and by the time of Charles 11, initials and letters were used. This caused a great deal of confusion and therefore in 1739, a statute decreed that all silversmiths should use the first initials of their Christian name and surname.
As there are so many maker’s marks, I would suggest a reference book such as “The Book of Old Silver” by Seymour B. Wyler or “London Goldsmiths 1697 – 1837” by Arthur G. Grimwade to determine the maker’s mark of your article. These are the 5 steps that can determine the hallmarks on any piece of antique British silver made in the last 400 years.
